

Now, everybody is normally nervous about Google Analytics 4. Apart from Universal Analytics’ built-in metrics and dimensions, we will definitely need more on GA4 eventually.
Firstly, after we determine what parameter(s) we need from the website, we need to categorize the parameters as dimensions or metrics.
Dimensions: According to Google, dimensions are attributes of our data. For example, Page Titles & Page URLs & Traffic Sources & Transaction IDs, or Product Categories can be Dimensions.
Metrics: Again, Google has indicated that if the parameters are quantitative, they are named as Metrics. For example, Revenue & Users & Sessions & Page Views, or Unique Clicks can be metrics.
If the dimension or metric that we seek is not a built-in parameter within existing GA4, we need to ask for help from GTM. So let’s dive in.
1) Adding a Custom Dimension from GTM
- Open your GTM account.
- Enter your GA4 Configuration Tag or GA4 Event Tag. (This step is extremely crucial, hence the dimension that we are going to define will be connected to this particular tag. For example, if the event is triggered by clicking on a specific button, the custom dimension can be “Click Text” or “Click URL”. So, when we go to the GA4 to debug the parameter, we will track the correspondent event to view the Custom Dimension.)

- Now you need to determine which parameter you want to track. You need to set a valid value for this parameter. You can go to the “Variables” section to use & create built-in variables on Google Tag Manager or create a brand new one with your advanced coding & GTM skills. For example, if you want to track “click_url”, the value of this parameter is already reachable from GTM. We just need to go to the Variables, click Configure and then select Clicks -> Click URL.

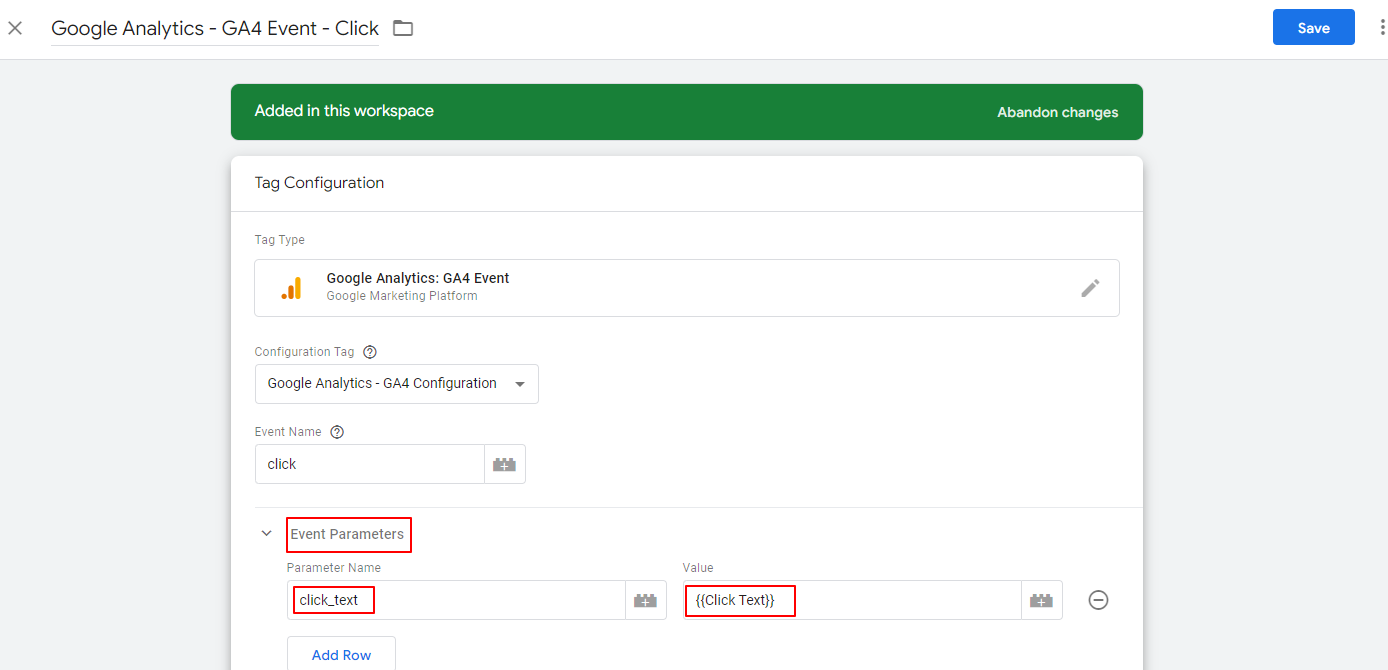
- Then come back to GA4 Event Tag and then click “Event Parameters”.
- Add your parameter name as your desired dimension which will be “click_url” in this case. IMPORTANT NOTE: If you have already a built-in dimension on Google Analytics 4 and you want to change its original value with your new configuration, you have to type the exact name. For example “page_location” is a built-in dimension connected with Pageview Hit. Therefore we need to type exactly “page_location” into the field.
- After you’ve typed the parameter name, enter the variable to the value section with this notation –> {{Variable Name}} such as {{Click URL}}.
- Click Save.
- To test –> Go to your GA4 Property. Enter Configure -> DebugView. Trigger the website event in which you’ve just defined a parameter from your GTM Preview Mode. Maximum 1 minute after you’ve triggered your related GA4 Event on the website, you should be able to see the event is fired with the defined dimension. To check its value, click on the event name and then see its parameters. If the values are correct, you’re good to publish the GTM container.
- Lastly, you need to define the Custom Dimension manually from Google Analytics 4 Panel. Otherwise, you won’t be able to use this custom definition on your Google Analytics 4 Reports. So, you need to use both of these platforms to complete the overall setup.
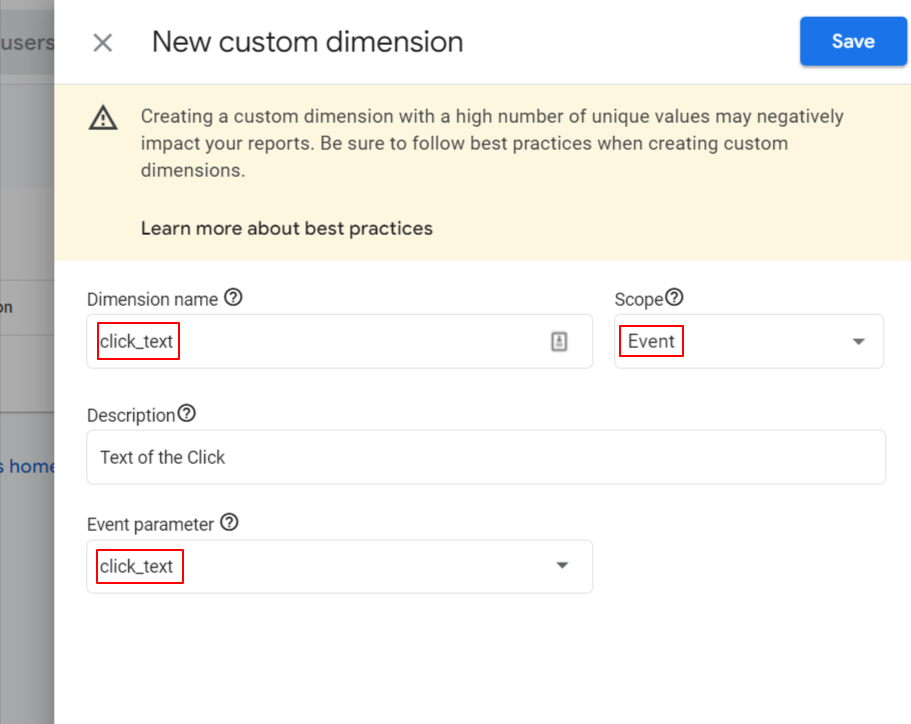
- Enter Configure -> Custom Dimensions and click to “Create custom dimensions”.

- Set “Dimension name”, “Scope” and “Event Parameter”. If the event is connected to the user, you can set its scope as “User”, i.e the Scope of the parameters like “user_id”, “user_cookie” must be User. Then type the event parameter that you’ve added as a field into your GA4 Event, for this instance it is going to be “click_text”.
- After 1 day, you will be able to use those values on your Explore reports.
2) Adding a Custom Metric from GTM
- Open your GTM account.
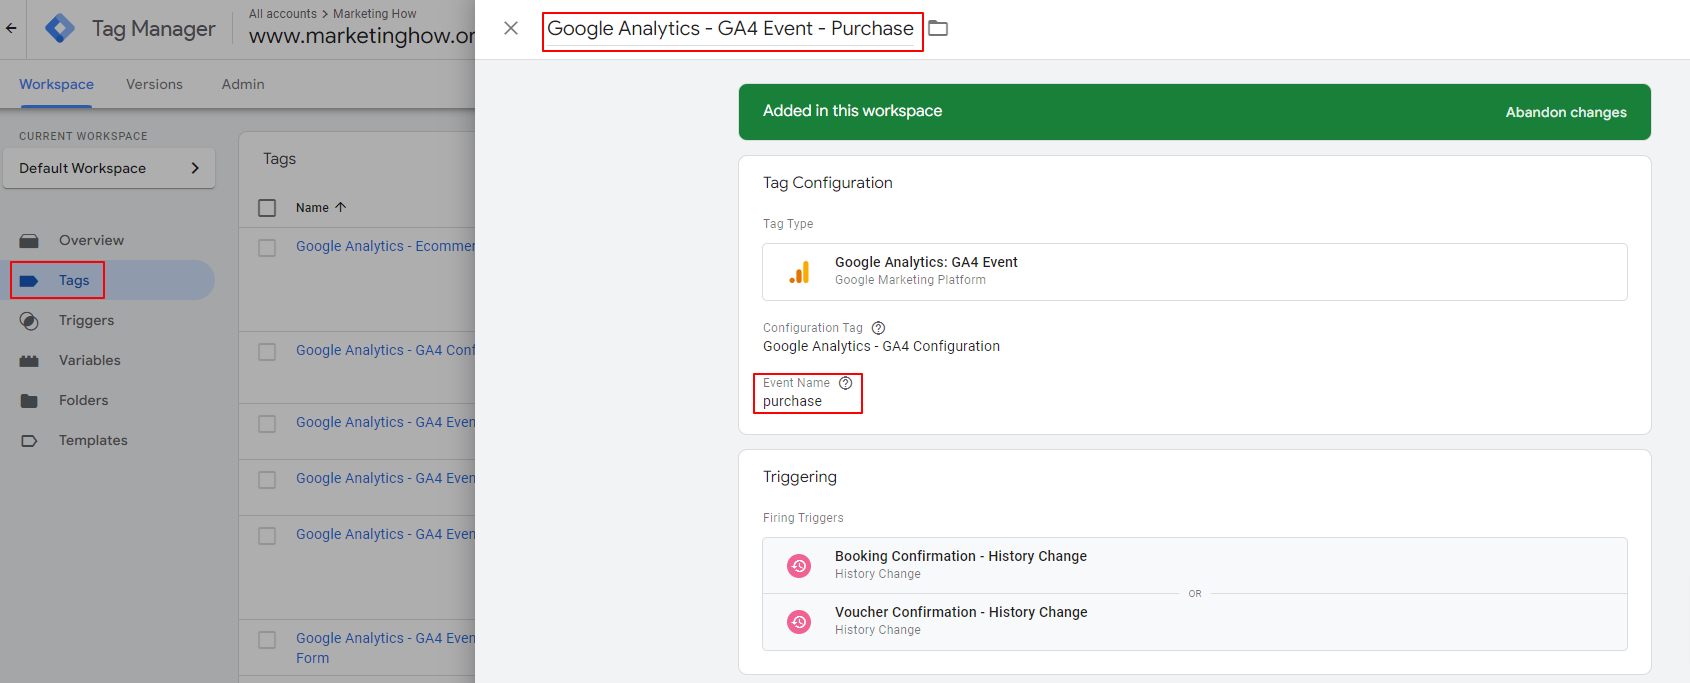
- Enter your GA4 Configuration Tag or GA4 Event Tag. (This step is extremely crucial, hence the metric that we are going to define will be connected to this particular tag. For example, if the event is triggered by the purchase of a product, the custom metric can be “Revenue” or “Quantity”. So, when we go to the GA4 to debug the parameter, we will track the correspondent event to view the Custom Metric.)
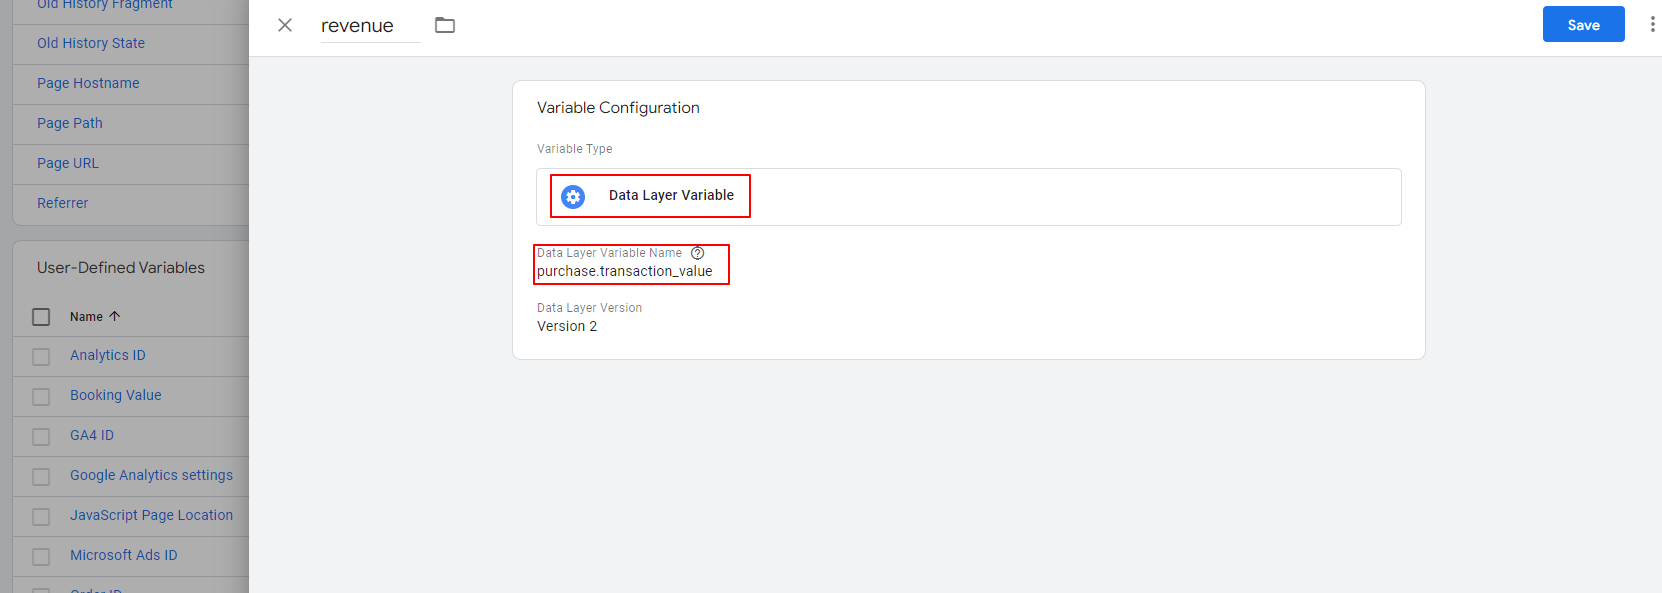
- Now you need to determine which parameter you want to track. You need to set a valid value for this parameter. You can go to the “Variables” section to use & create built-in variables on Google Tag Manager or create a brand new one with your advanced coding & GTM skills. For example, if you want to track “revenue”, the value of this parameter is not reachable directly from GTM. We will need to send the revenue data to dataLayer. After we’ve sent the data to the dataLayer, we just need to define a Data Layer Variable and fetch the value from the dataLayer To exemplify, if the revenue value is sitting under the “purchase” object’s “transaction_value” key, we will type “purchase.transaction_value” to bring it to the GTM.
- Then come back to GA4 Event Tag and then click “Event Parameters”.
- Add your parameter name as your desired dimension which will be “revenue” in this case.
- After you’ve typed the parameter name, enter the variable to the value section with this notation –> {{Variable Name}} such as {{revenue}}.
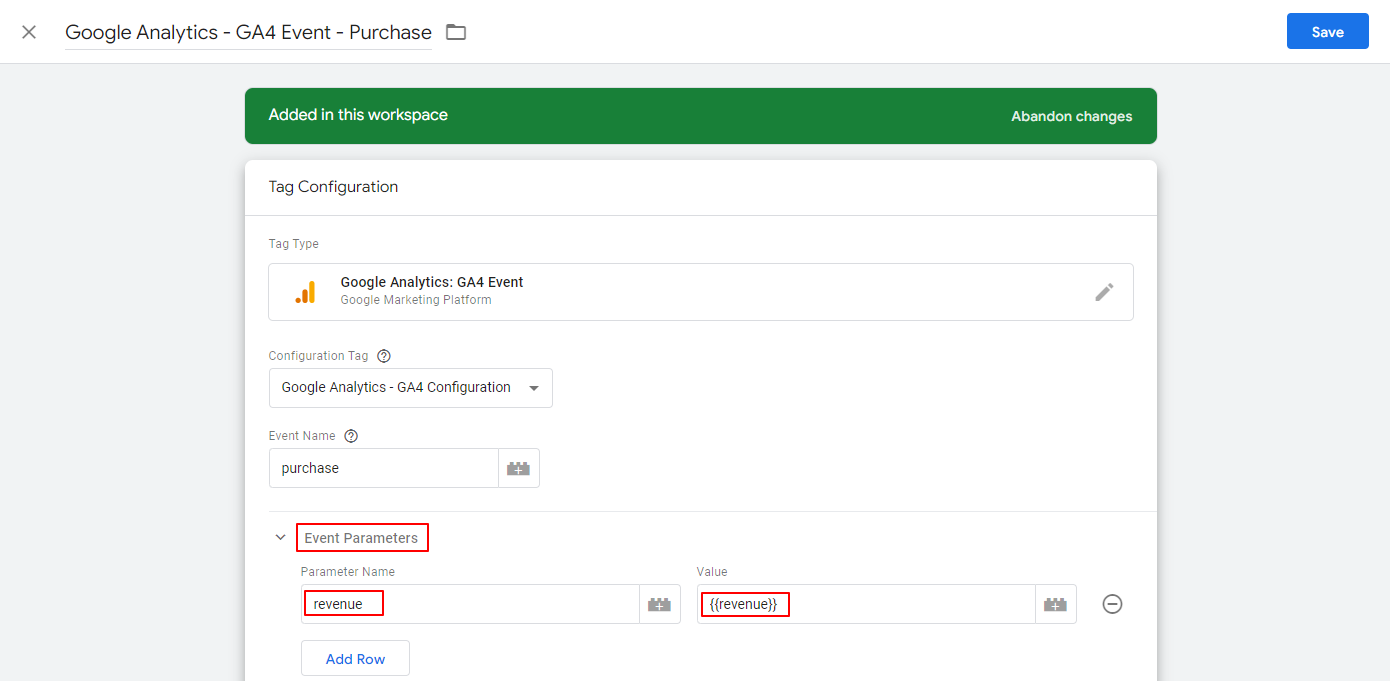
- Click Save.
- To test –> Go to your GA4 Property. Enter Configure -> DebugView. Trigger the website event in which you’ve just defined a parameter from your GTM Preview Mode. Maximum 1 minute after you’ve triggered your related GA4 Event on the website, you should be able to see the event is fired with the defined metric. To check its value, click on the event name and then see its parameters. If the values are correct, you’re good to publish the GTM container.
- Lastly, you need to define the Custom Metric manually from Google Analytics 4 Panel. Otherwise, you won’t be able to use this custom metric on your Google Analytics 4 Reports. So, you need to use both of these platforms to complete the overall setup.
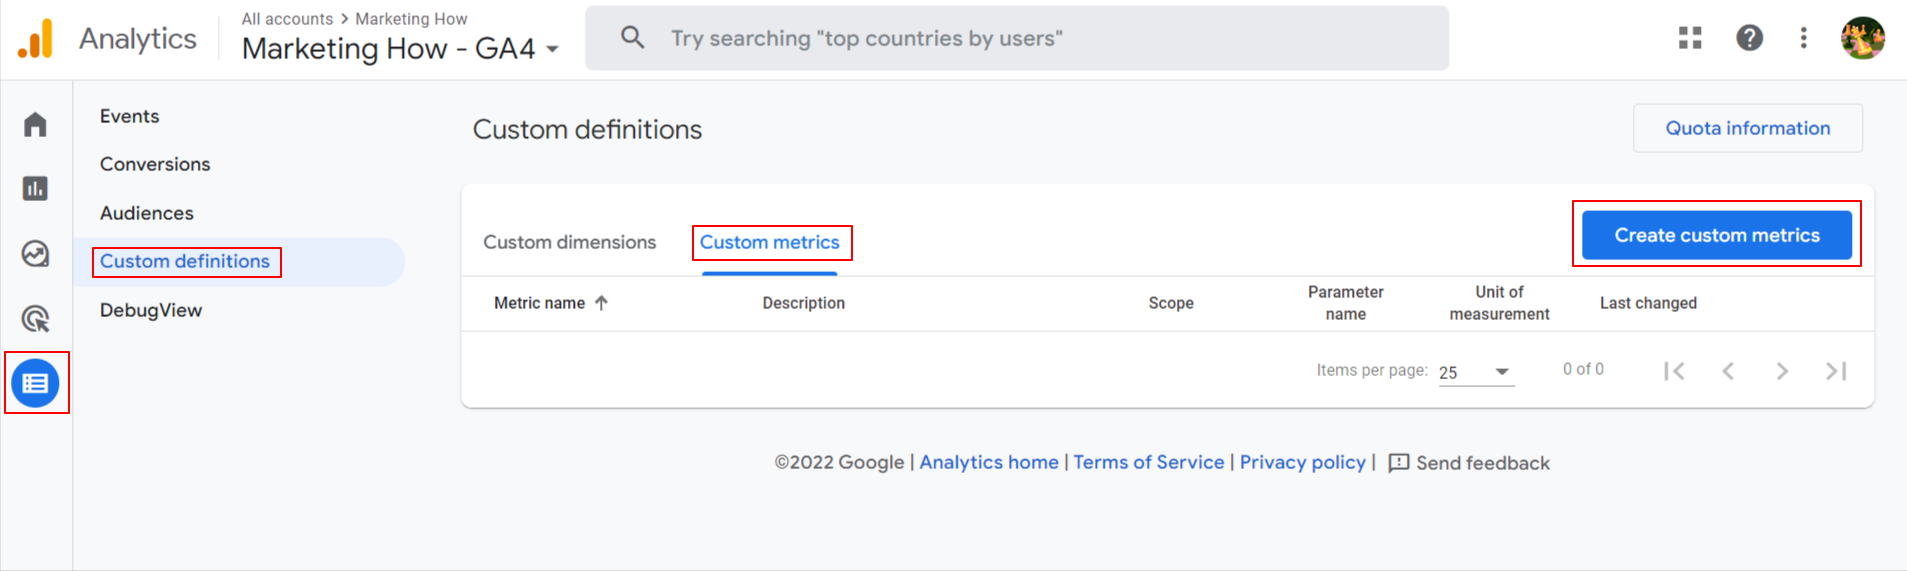
- Enter Configure -> Custom Metric and click to “Create custom metrics”.
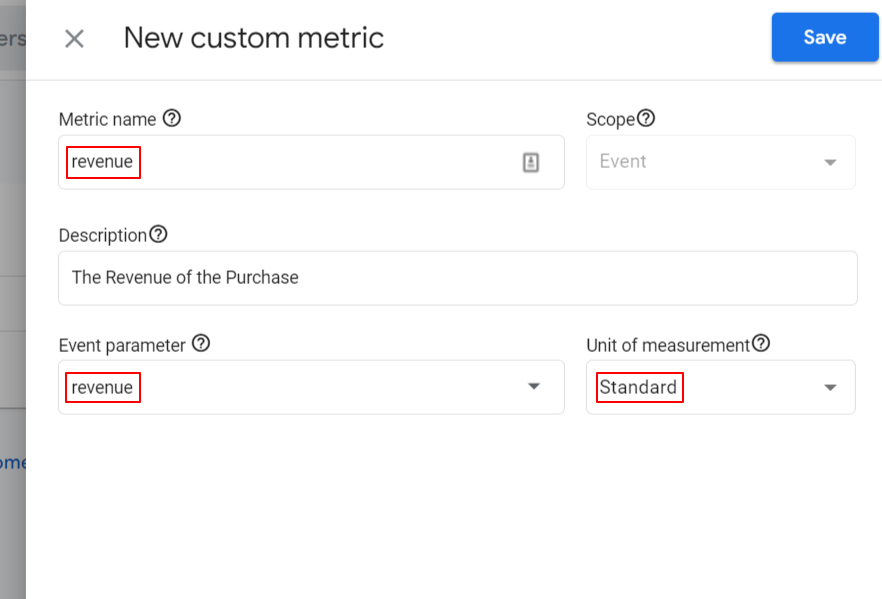
- Set “Metric name”, “Event Parameter” and “Unit of measurement”. There are plenty of Units of measurement types such as currency, miles, and seconds. Then type the event parameter that you’ve added as a field into your GA4 Event, for this instance it is going to be “revenue”.
- After 1 day, you will be able to use those values on your Explore reports.
Thank you,
